
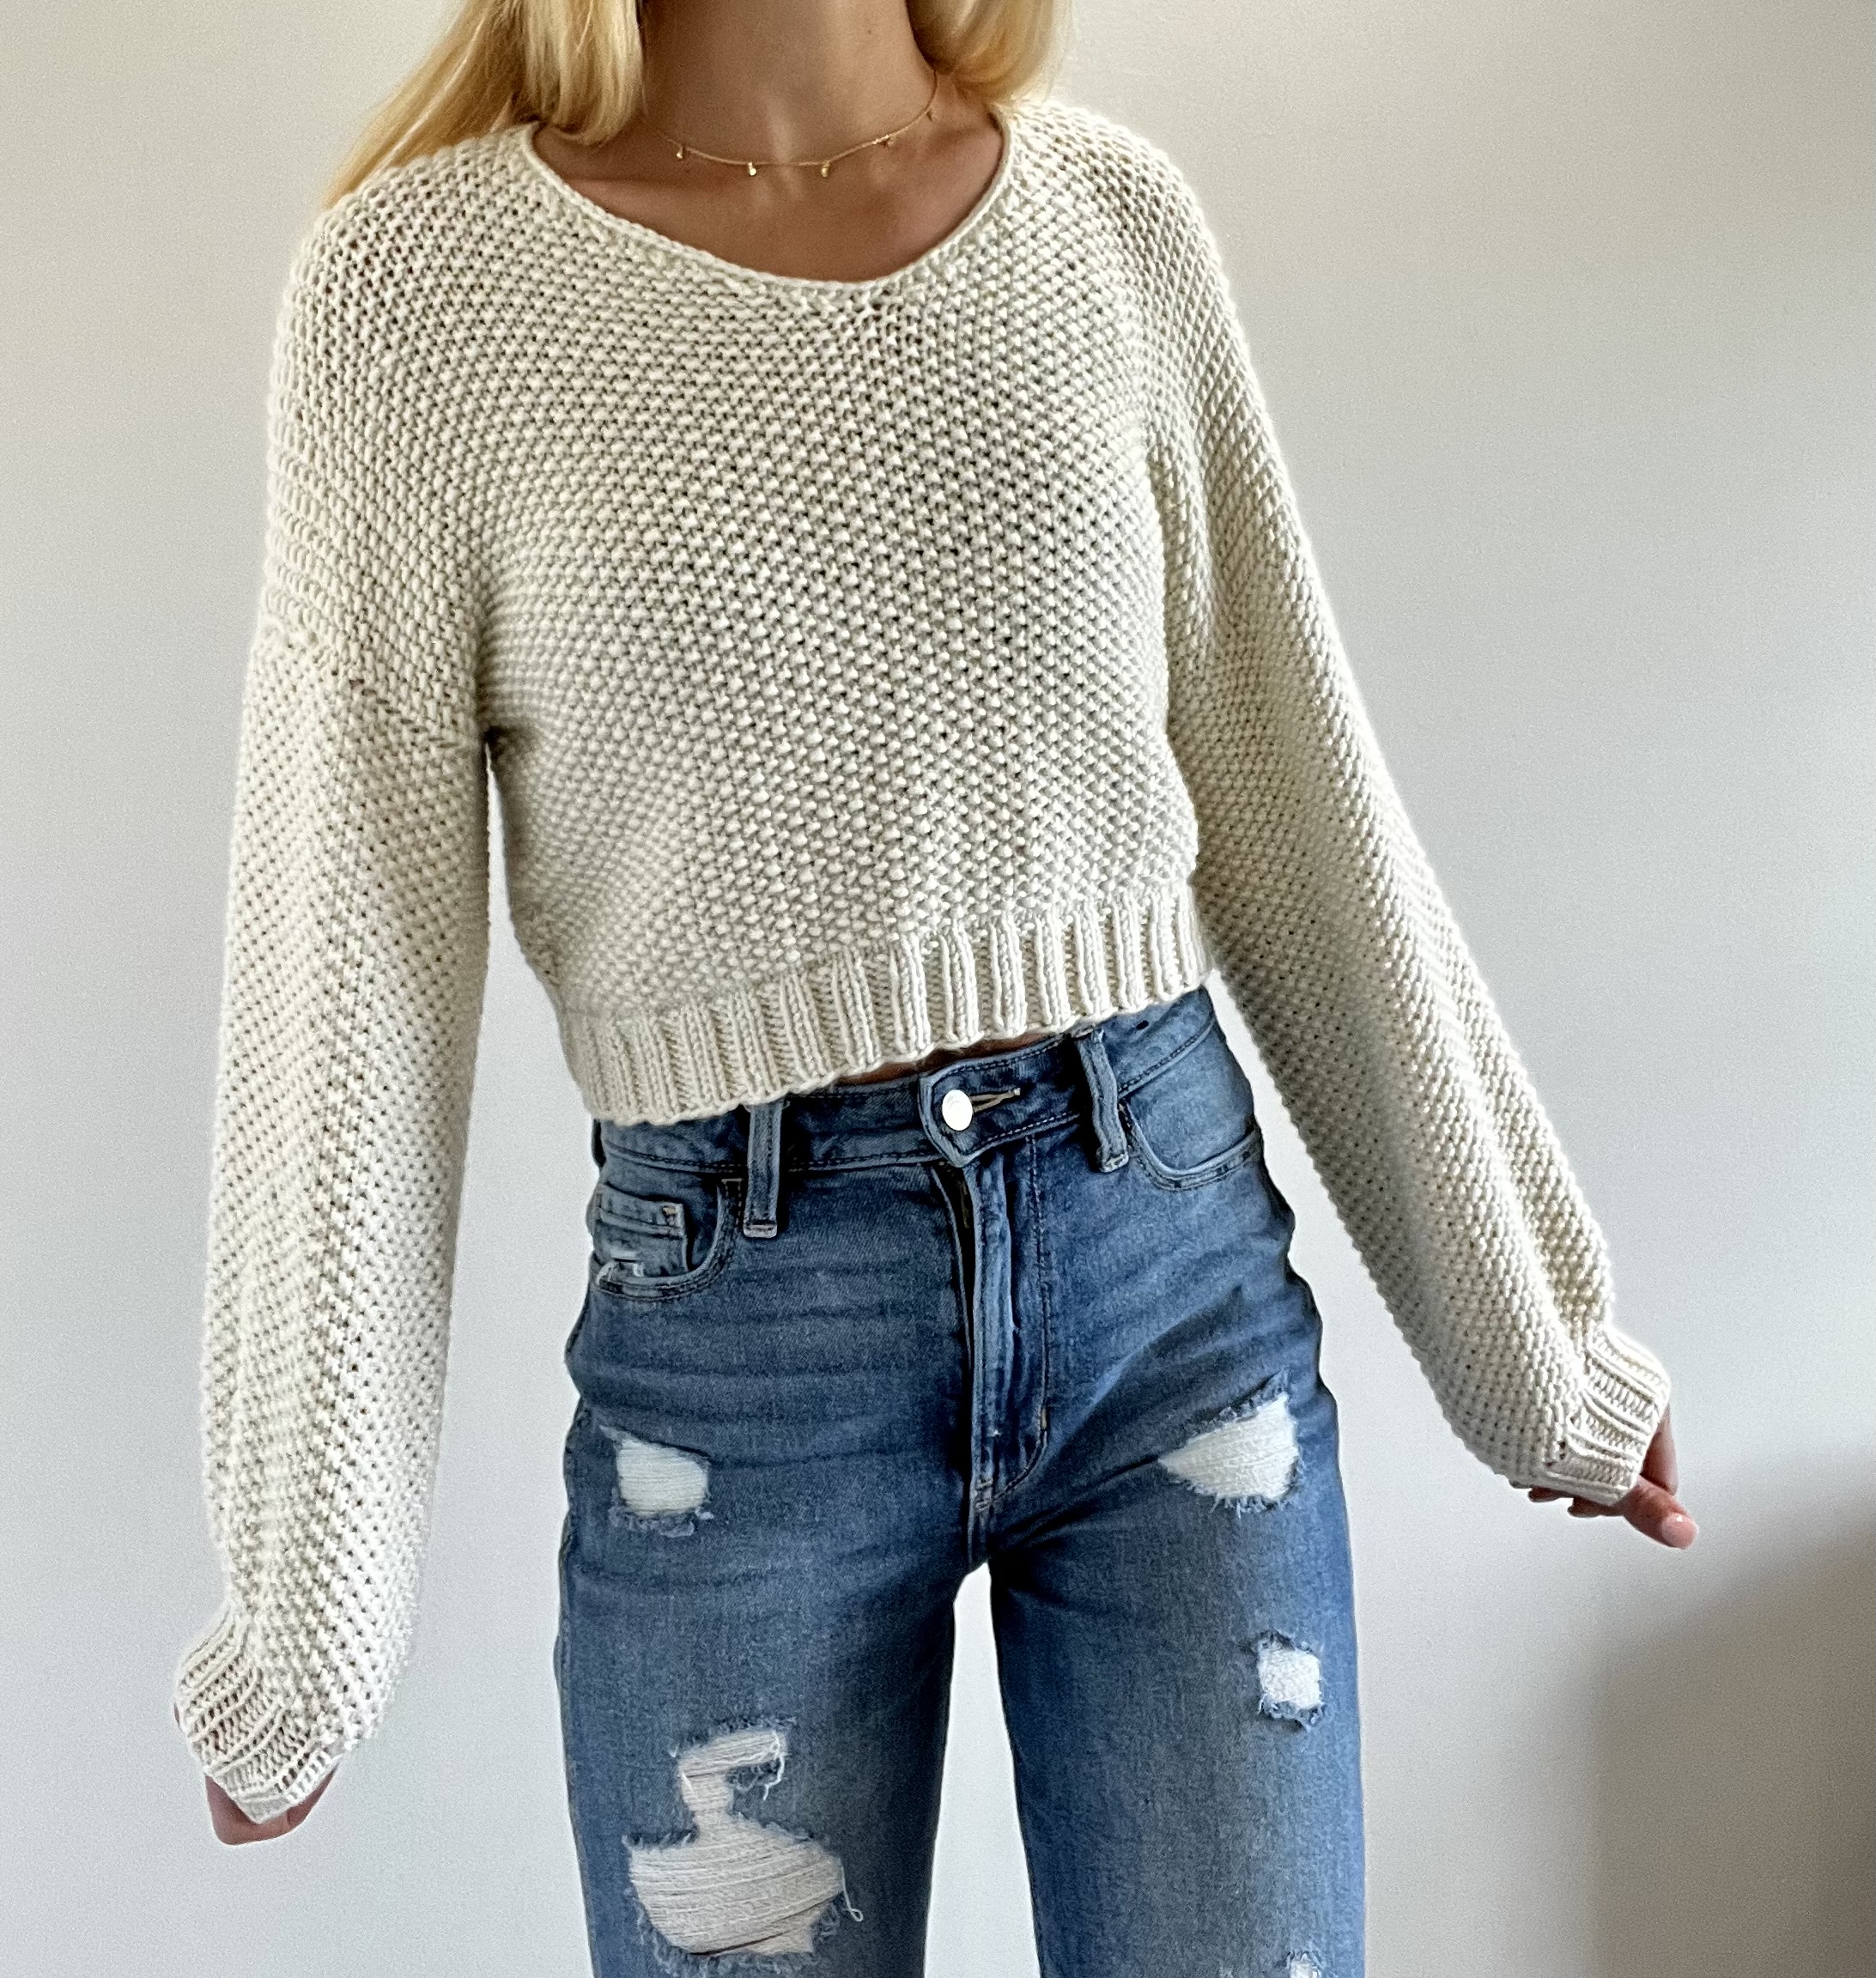
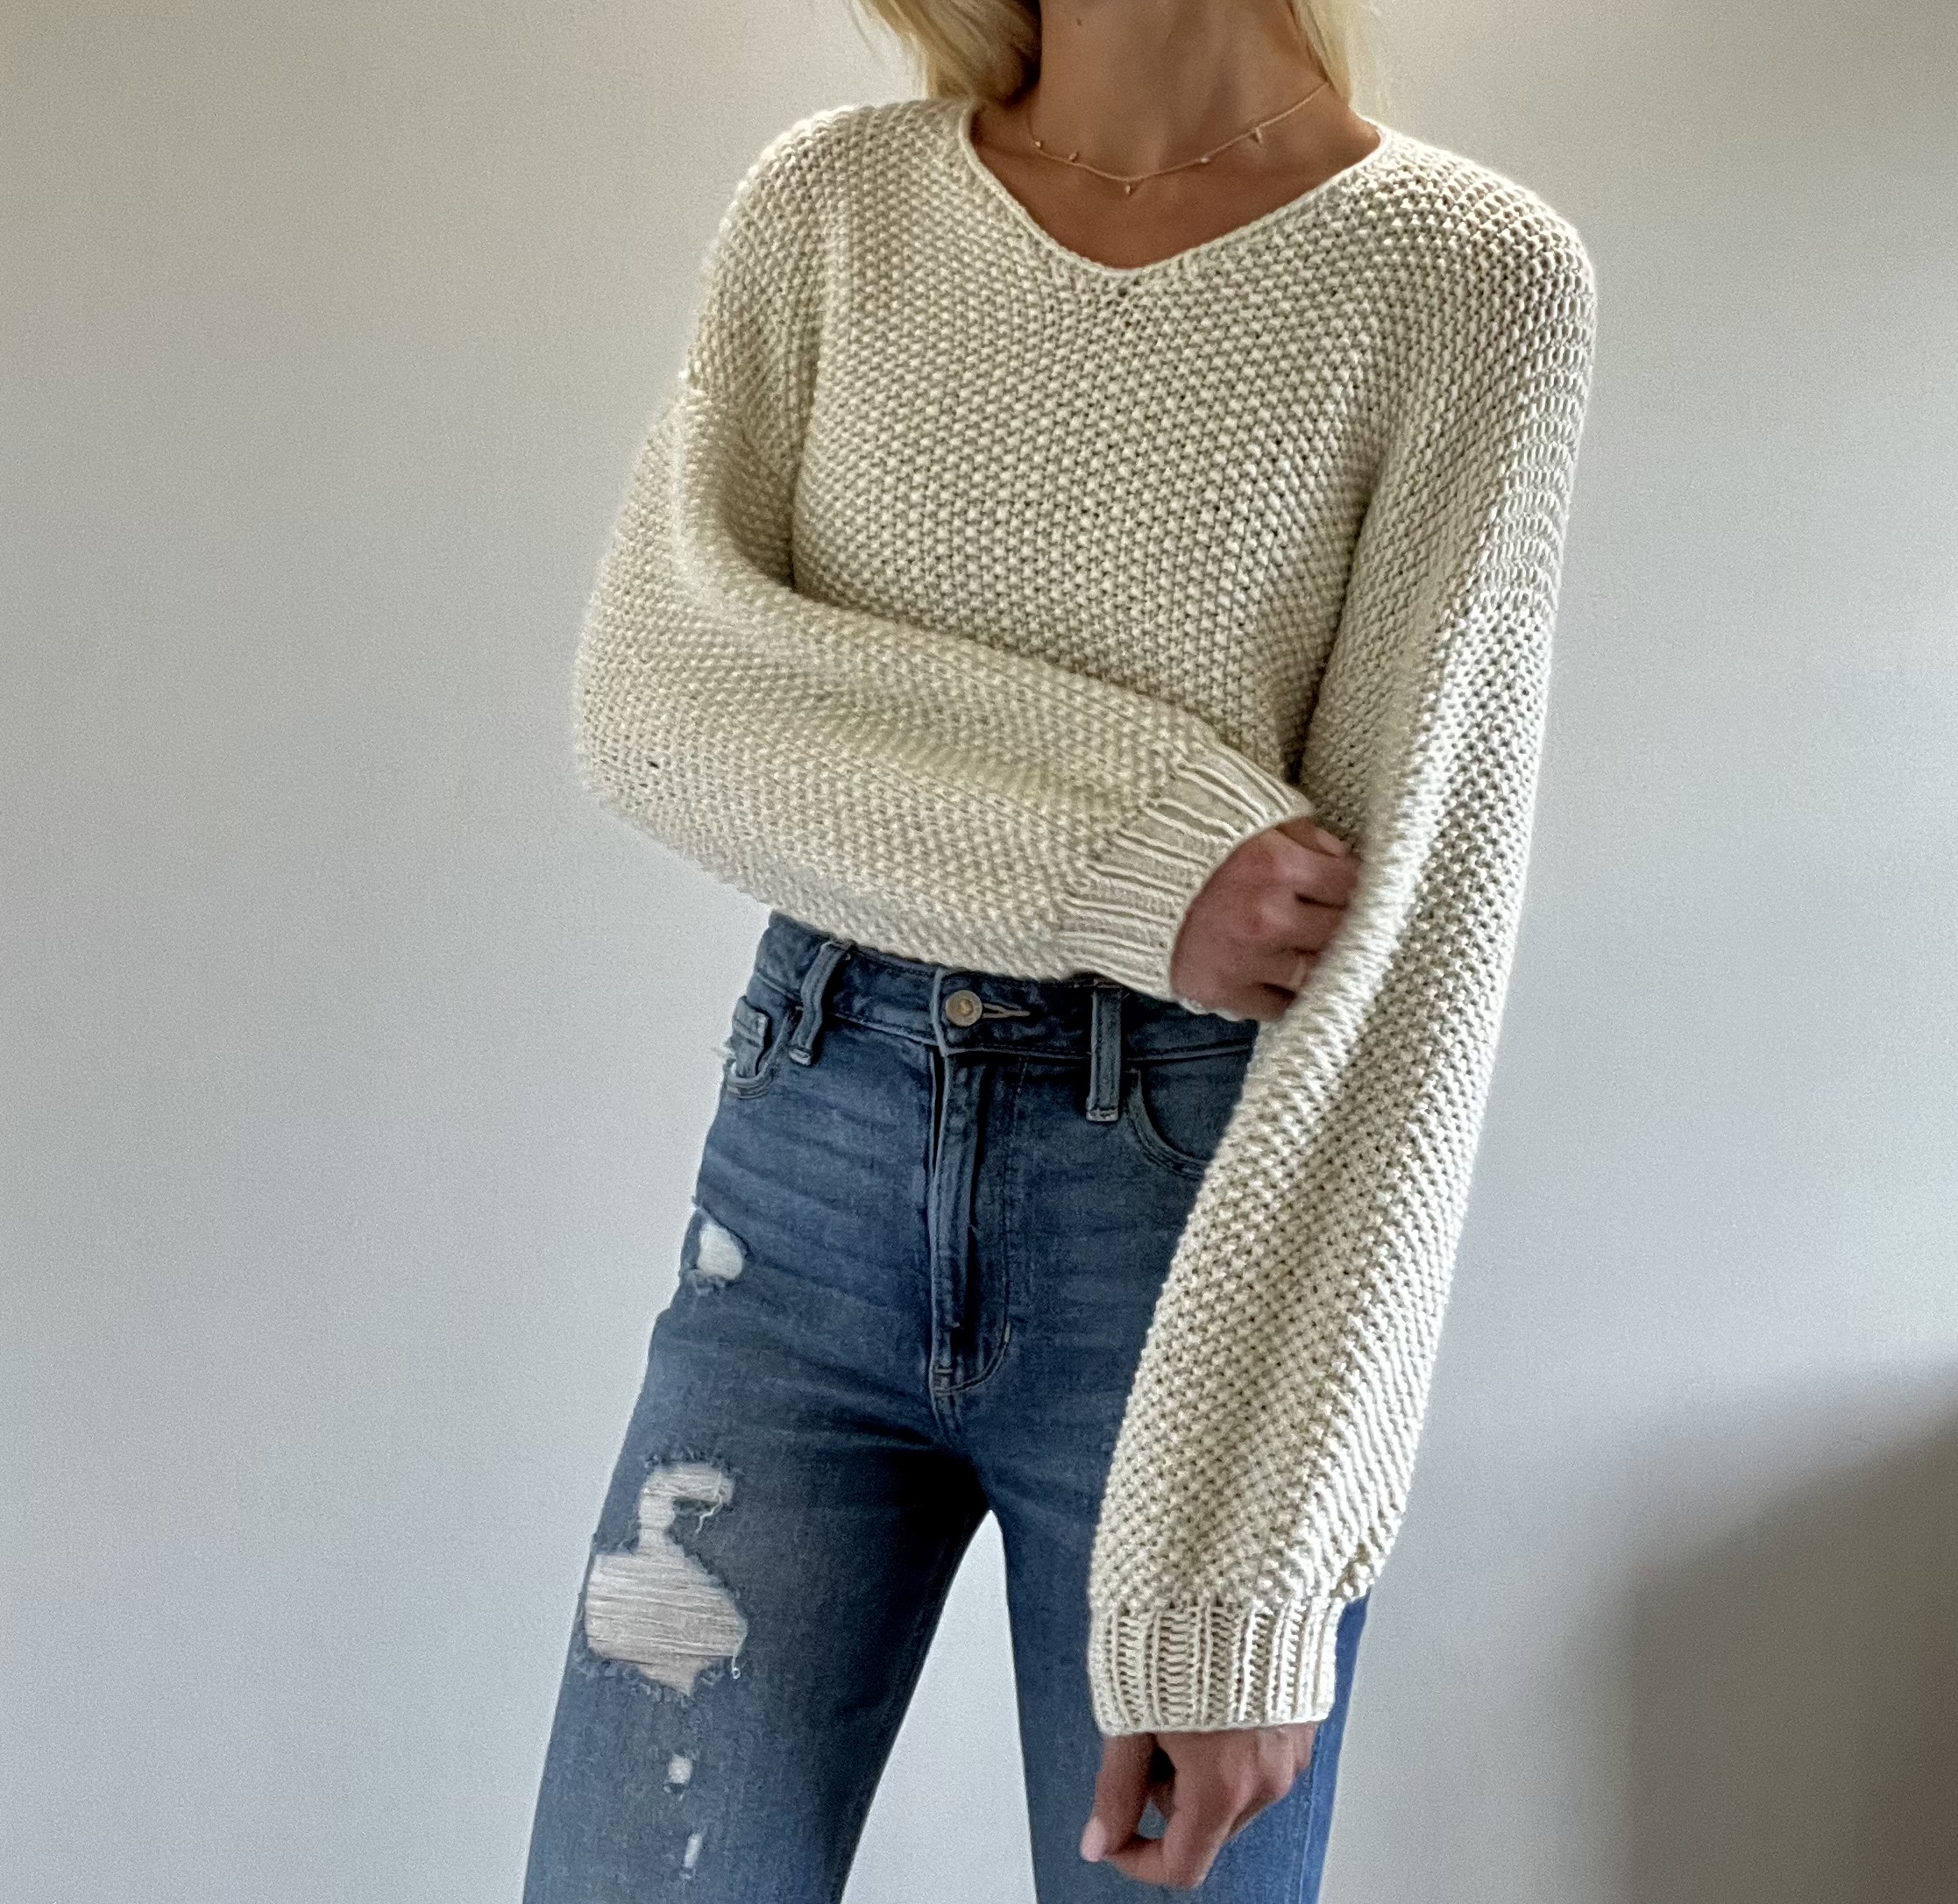
This cropped sweater is the ultimate springtime pullover! It has quickly become a wardrobe staple for me in the early spring and summer mornings when it’s still chilly out 🙂
With a flattering scoop neck, relaxed body and full sleeves, this textured sweater is comfy, cozy, lightweight and versatile! You can dress it up with a skirt or just lounge around in this adorable crop. It pairs super well with high waisted jeans and shorts; a perfect layer to add in cooler mornings and evenings.
Seed Stitch
The main body and sleeves of this simple sweater knitting pattern use a beginner-friendly stitch pattern called Seed Stitch.
Seed stitch is worked by alternating knit and purl throughout the row and between rows. It’s quite easy to get the hang of, and after a few rows you’ll be able to knit mindlessly while watching TV or listening to an audiobook. 🙂
Seed stitch gives this cropped knit sweater pattern a bit of a dreamy, vintage look. It’s sweet and feminine and I bet it’ll become one of your wardrobe favorites too!
The seed stitch makes up the bulk of the sweater while 2×2 rib stitch and 1×1 rib stitch form the cuffs and the bottom ribbing. Combined together, these stitches give the Springtime Sweater lovely drape that hugs your body in all the right places!
This post may contain affiliate links. View our disclosure policy for details.
I love the pronounced texture of seed stitch in this sweater, and the scoop neck and cropped fit make it look like something out of a boutique clothing store. It’s a modern handknit sweater that does not look homemade!
You could easily pair this cropped knit sweater with jean shorts for a comfy, cozy summer vibe or bring it into fall with you! It’s a versatile layering piece that goes with just about anything. The Springtime Sweater is the ideal transitional pullover for in between seasons!

Construction
This simple knit sweater pattern is worked up entirely in one piece, with very little seaming.
I don’t know why, but I really do not enjoy sewing sweater pieces together. I designed this sweater to require as little seaming as possible!
To begin the Springtime Sweater, the body is worked in the flat in one long panel, leaving an opening for the neck with some minimal neckline shaping. It is then folded in half, side seams sewn together, and sleeves picked up and worked in the round.
Since the body panel is worked in one piece, we’ll first knit the front panel with neckline shaping, transfer half of the stitches off, return to those stitches and then connect the neckline by casting on.
The only sewing you’ll have to do is on the sides, leaving a gap open for the armholes.
After assembly you’ll pick up stitches around the neckline and then immediately bind them off for a simple and understated collar. Weave in your loose yarn ends, block your sweater and you’ll be set!
Knitting Life Hacks to Make Your Project Easier
Don’t sleep on stitch markers!
Seriously, when you’re counting rows, it makes it so much easier to use stitch markers. I like to use stitch markers every 5-10 rows depending on the project, so I don’t have to count all the way from the first one, but instead can count rows in groups of five or ten.
Another top tip that will make your project easier is having an extra set of 4.5mm knitting needles handy. That way when you need to transfer stitches, you can just leave them on the needle, and pick up using another needle of the same size.
Print The PDF & Knit Your Heart Out
If you love curling up on the couch with your knitting and don’t want to be bothered by following along with the pattern on your laptop, tablet, or phone, there is always a low-cost, ad-free printable PDF of this simple sweater knitting pattern.
The easy-to-read printout is a nice way to follow along with the pattern with the ability to jot down notes as you go or mark where you left off. It includes all the photos and step by step instructions. You won’t have to worry about the wifi cutting out, the webpage reloading, or slow internet speeds that might make you lose your place!
The Springtime Sweater has a few different steps involved and having the printed pattern allows you to easily flip back and forth between steps to make sure you’re tracking correctly. Go check it out!
Design Inspiration
The most worn items in my wardrobe are crop tops. I love pairing a crop top with high waisted jeans or shorts.
When it’s chilly and I need to layer up, I wanted a cropped sweater that would match the vibe of my outfit, rather than one that fell all the way to my hips.
I actually shopped around for awhile looking for a nice cropped sweater to add to my wardrobe and came up short. Thus I decided it was time to knit my own!
I wanted a trendy yet understated sweater, so the decision was made to do a scoop neck without neckline ribbing and seed stitch for visual interest.
In my opinion, the key to modern knitting is all about simplicity.
A lot of what comes to mind when you imagine grandma’s knitting are sweaters with intricate knitwork patterns, lots of colors, and repeating motifs.
While that kind of knitting is certainly beautiful in its own way, designs appear much more modern with a continuous knit pattern throughout, sticking to a monochrome color scheme, and leaving color-blocking behind.
With its modern cropped length and understated elegance, you can wear this easy sweater at home, out on a date night, or even to work. I think the shape of the sweater would look dynamite with a pencil skirt!
The shape of this sweater has just enough positive ease to make it feel relaxed and comfy while still hugging your body in all the right places. The sleeves are full and generous so you could layer a long sleeve tee underneath if it’s colder out. The scoop neck shows off your collarbone and the cropped length pairs perfectly with high waisted pants.
This cropped sweater knitting pattern would also drape perfectly over a sundress. Bring it along if you need an extra layer at an evening summer party!
Check Out More Free Knitting Patterns!


What Yarn Do I Need?
This simple sweater knitting pattern uses Pearlspun by Yarn Bee which is a super soft acrylic yarn. It’s machine washable and won’t stretch after blocking, so your knitted garment will be true to size once it’s worked up!
This yarn has a bit of a bouncy and marshmallowy feel that is just so comfy cozy to snuggle up in. It won’t stretch out much and retains its shape super well over time.
There are plenty of shades to choose from, and you can order online from Amazon or pick it up at your local Hobby Lobby. I worked up the Springtime Sweater in the color Pearl. It’s a perfect off-white; not yellowy at all but softer than a true white!
Can I Substitute For A Different Yarn?
Pearlspun by Yarn Bee is a worsted weight yarn (medium/category 4) so you can easily swap it out for any other worsted weight yarn.
I’m partial to machine-washable yarns for easy maintenance, but be sure to read the label of any yarn you’re using so that you understand the proper care instructions!
If you’re making a substitution, make sure you choose a soft, billowy yarn in order to achieve the same look as the photos.

I’d love to see your finished projects! Use #themodernmakerco and tag me on Instagram or TikTok @themodernmakerco to connect with me!
Springtime Sweater | Simple Sweater Knitting Pattern
This adorable cropped sweater is knit almost entirely in one piece with very little seaming. The seed stitch gives it a nice texture, and the cropped fit makes it perfect for cooler spring and summer days! Model is 5’7″ (170 cm) wearing size XS. The finished garment will have some positive ease for a slightly relaxed fit.
NOTES:
The sweater length can be easily customized if you don’t want it to be cropped. Simply knit additional rows before the neckline shaping.
The skills you need for this pattern are knit, purl, basic decreasing, and picking up stitches.
Materials
- Yarn – Category 4 – Medium weight: 705-985 yards (I used Pearlspun by Yarn Bee in the color
Pearl) - US size 7 (4.5mm) knitting needles (straight and circular/double pointed)
- Stitch markers
- Tapestry needle
- Scissors
- Stitch holder
Gauge
18 stitches and 28 rows = 4×4 inches (10×10 cm) in seed stitch.
Abbreviations
R = row
St = stitch
RS = right side
WS = wrong side
K2tog = knit two together
Stitches Used
- Seed Stitch: Made by alternating knit stitches and purl stitches within a row and between rows. It is identical on both sides and lies flat.
- 1×1 Rib Stitch: Made by alternating knit and purl stitches in one row and “knitting by pattern” in every next row. This means that you knit the knit stitches and purl the purlstitches.
- 2×2 Rib Stitch: Almost identical to the 1×1 Rib Stitch, but is made by alternating 2 knitand 2 purl stitches in every row.
Women's Size Chart

Please choose your size based on the chart above.
Body
This pattern is written in the format of XS (S, M, L, XL, 2XL).
Cast on 72 (78, 84, 90, 96, 102) st.
R1 (RS): K2, P2. (For sizes S, L, and 2XL, you will end with K2.)
R2 (WS): P2, K2. (For sizes S, L, and 2XL, you will start with K2).
Repeat R1&R2 until you have completed 12 rows.
R13 (RS): Knit entire row.
R14 (WS): Purl entire row.
R15 (RS): K1, P1 .
R16 (WS): P1, K1.
Repeat R15&R16 until work is 13 (13.5, 14, 15, 16, 17) inches or 33 (34, 36, 38, 41, 43) cm tall, or desired length (neckline will hit just below collarbone, so you can use that as a guide if you are adding rows).
Neckline Shaping
R17: Work seed stitch across the first 36 (39, 42, 45, 48, 51) stitches. Transfer the remaining 36 (39, 42, 45, 48, 51) stitches to a stitch holder.
R18: Turn, k2tog, work seed stitch across the row to the outside edge.
R19: Work seed stitch across.
Repeat R18&R19 until 24 stitches remain.
R20: Work seed stitch across.
Repeat R20 six times. Do not cut yarn; transfer stitches to a stitch holder.
Using a new skein of yarn, transfer the stitches from the stitch holder at R17; repeat R17-R20.

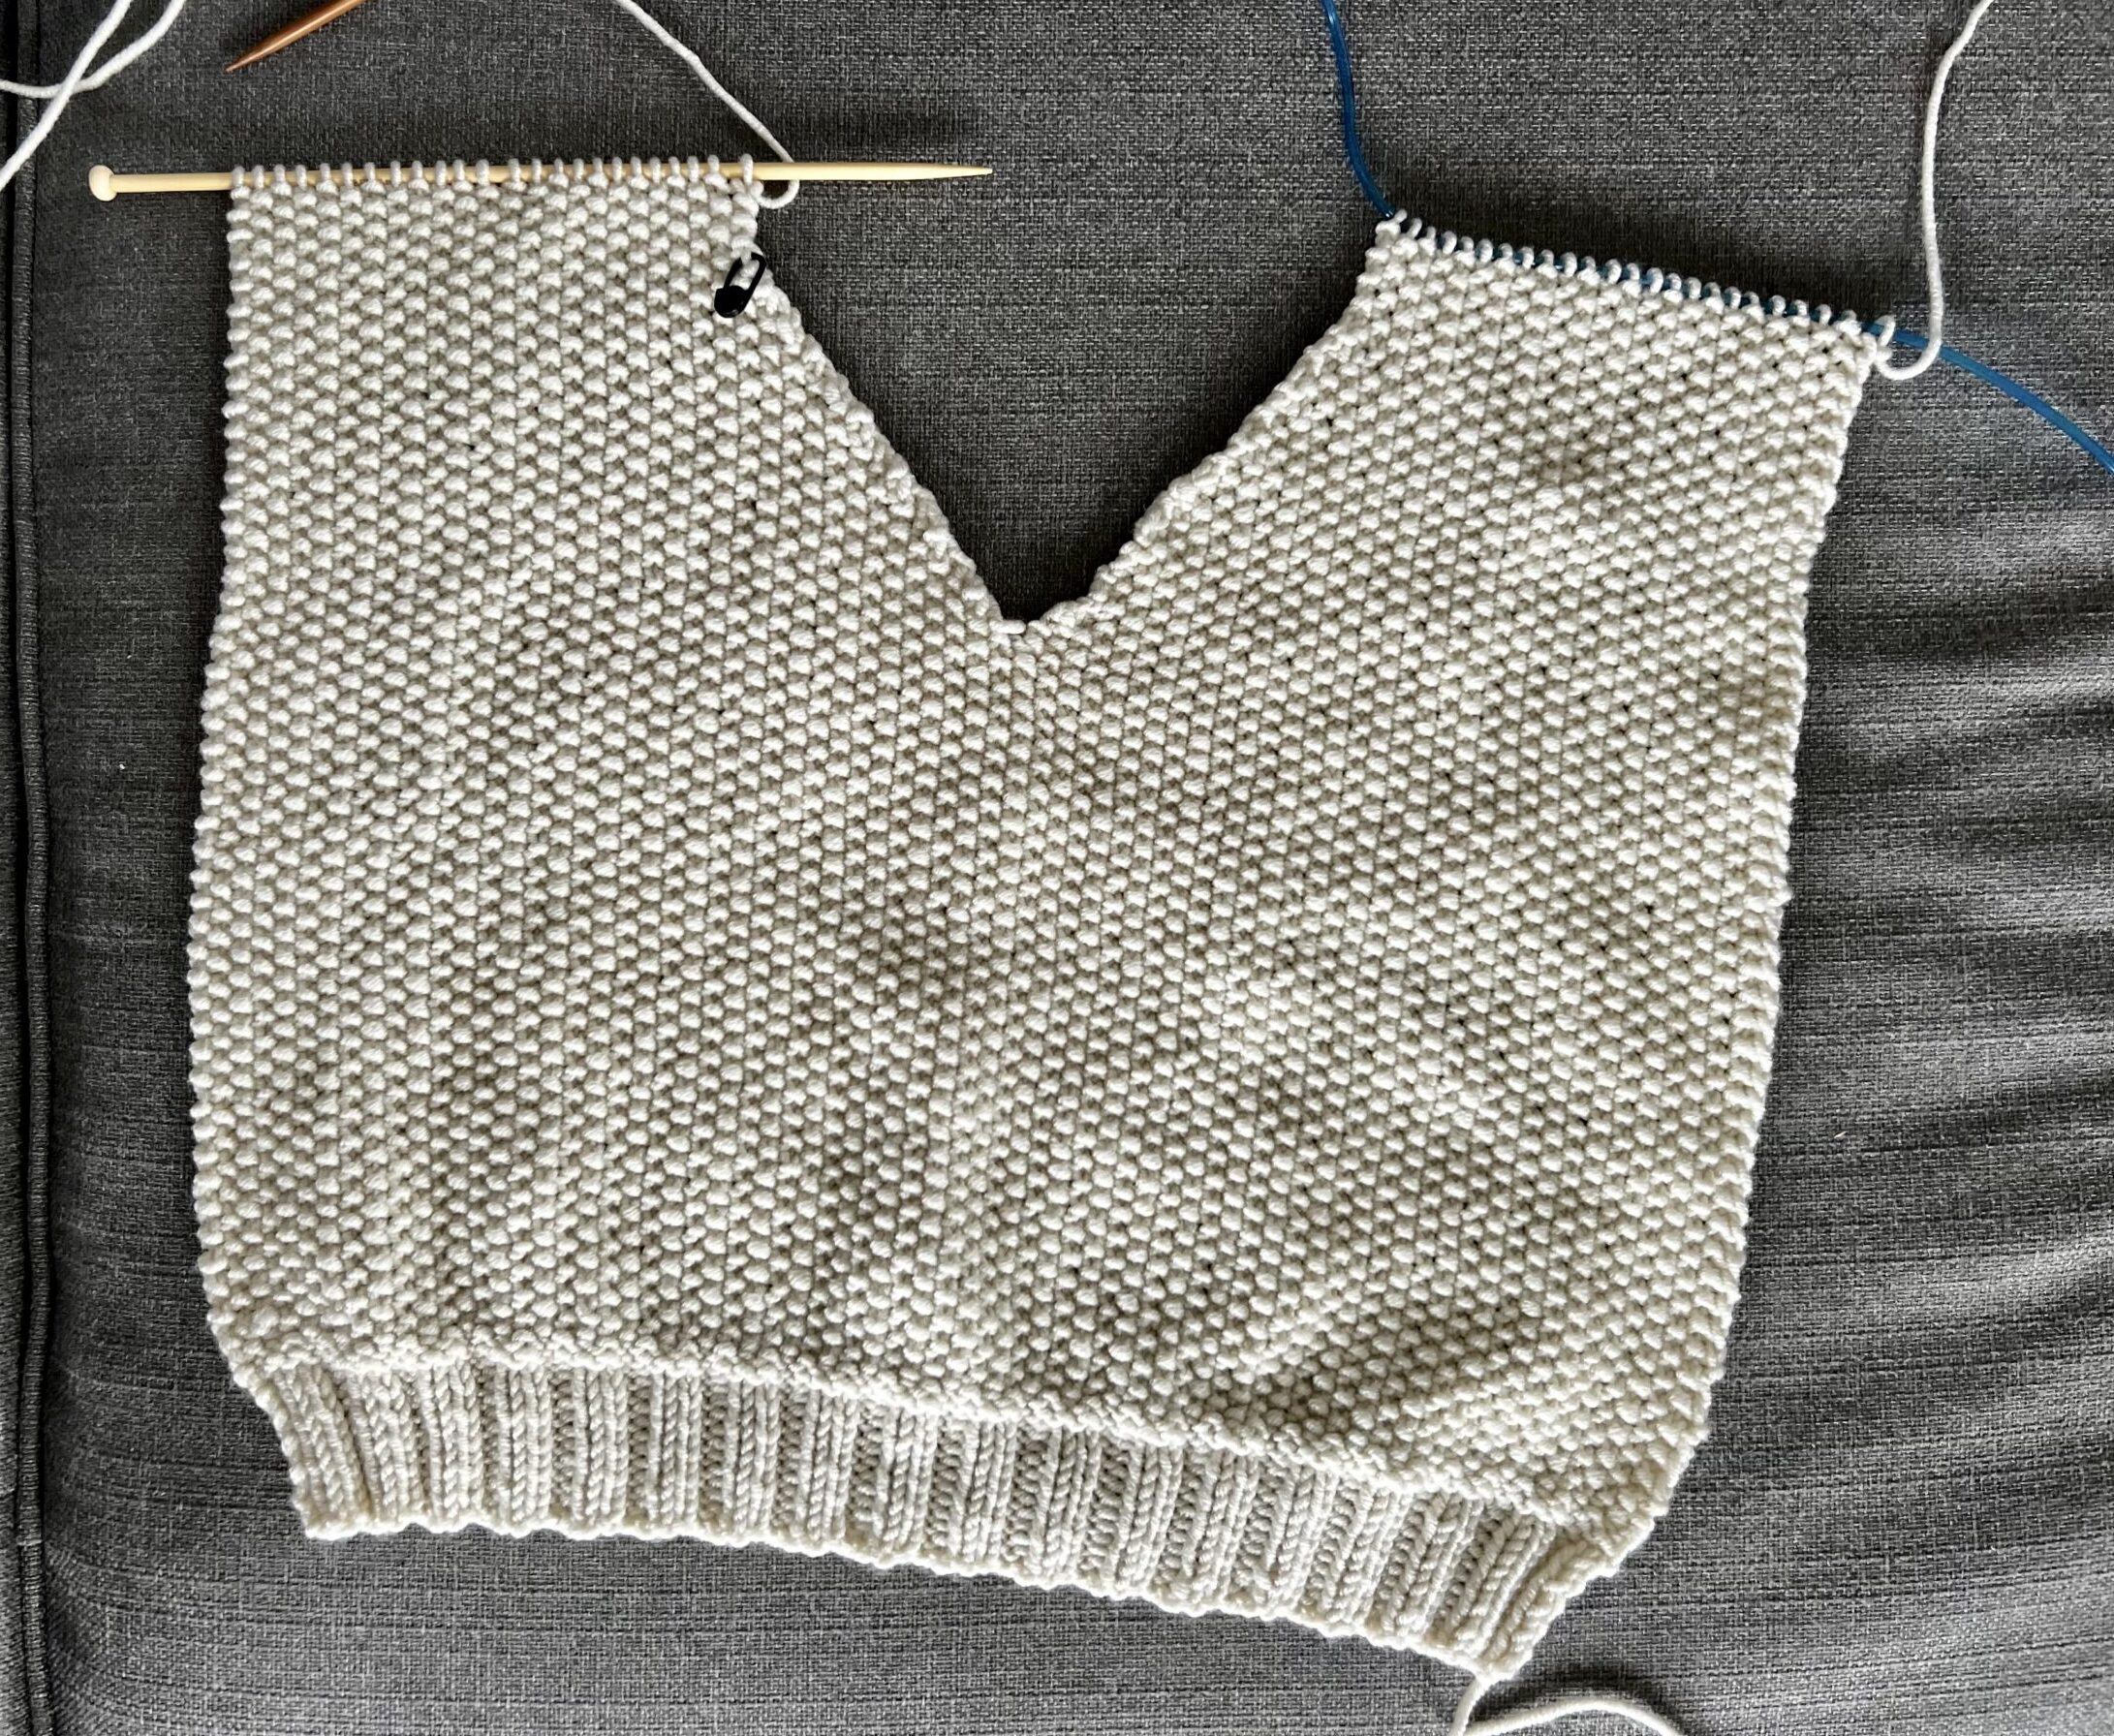
R21: Work seed stitch across entire row, cast on 24 (30, 36, 42, 48, 54) stitches, workseed stitch across opposing row to connect the neckline.
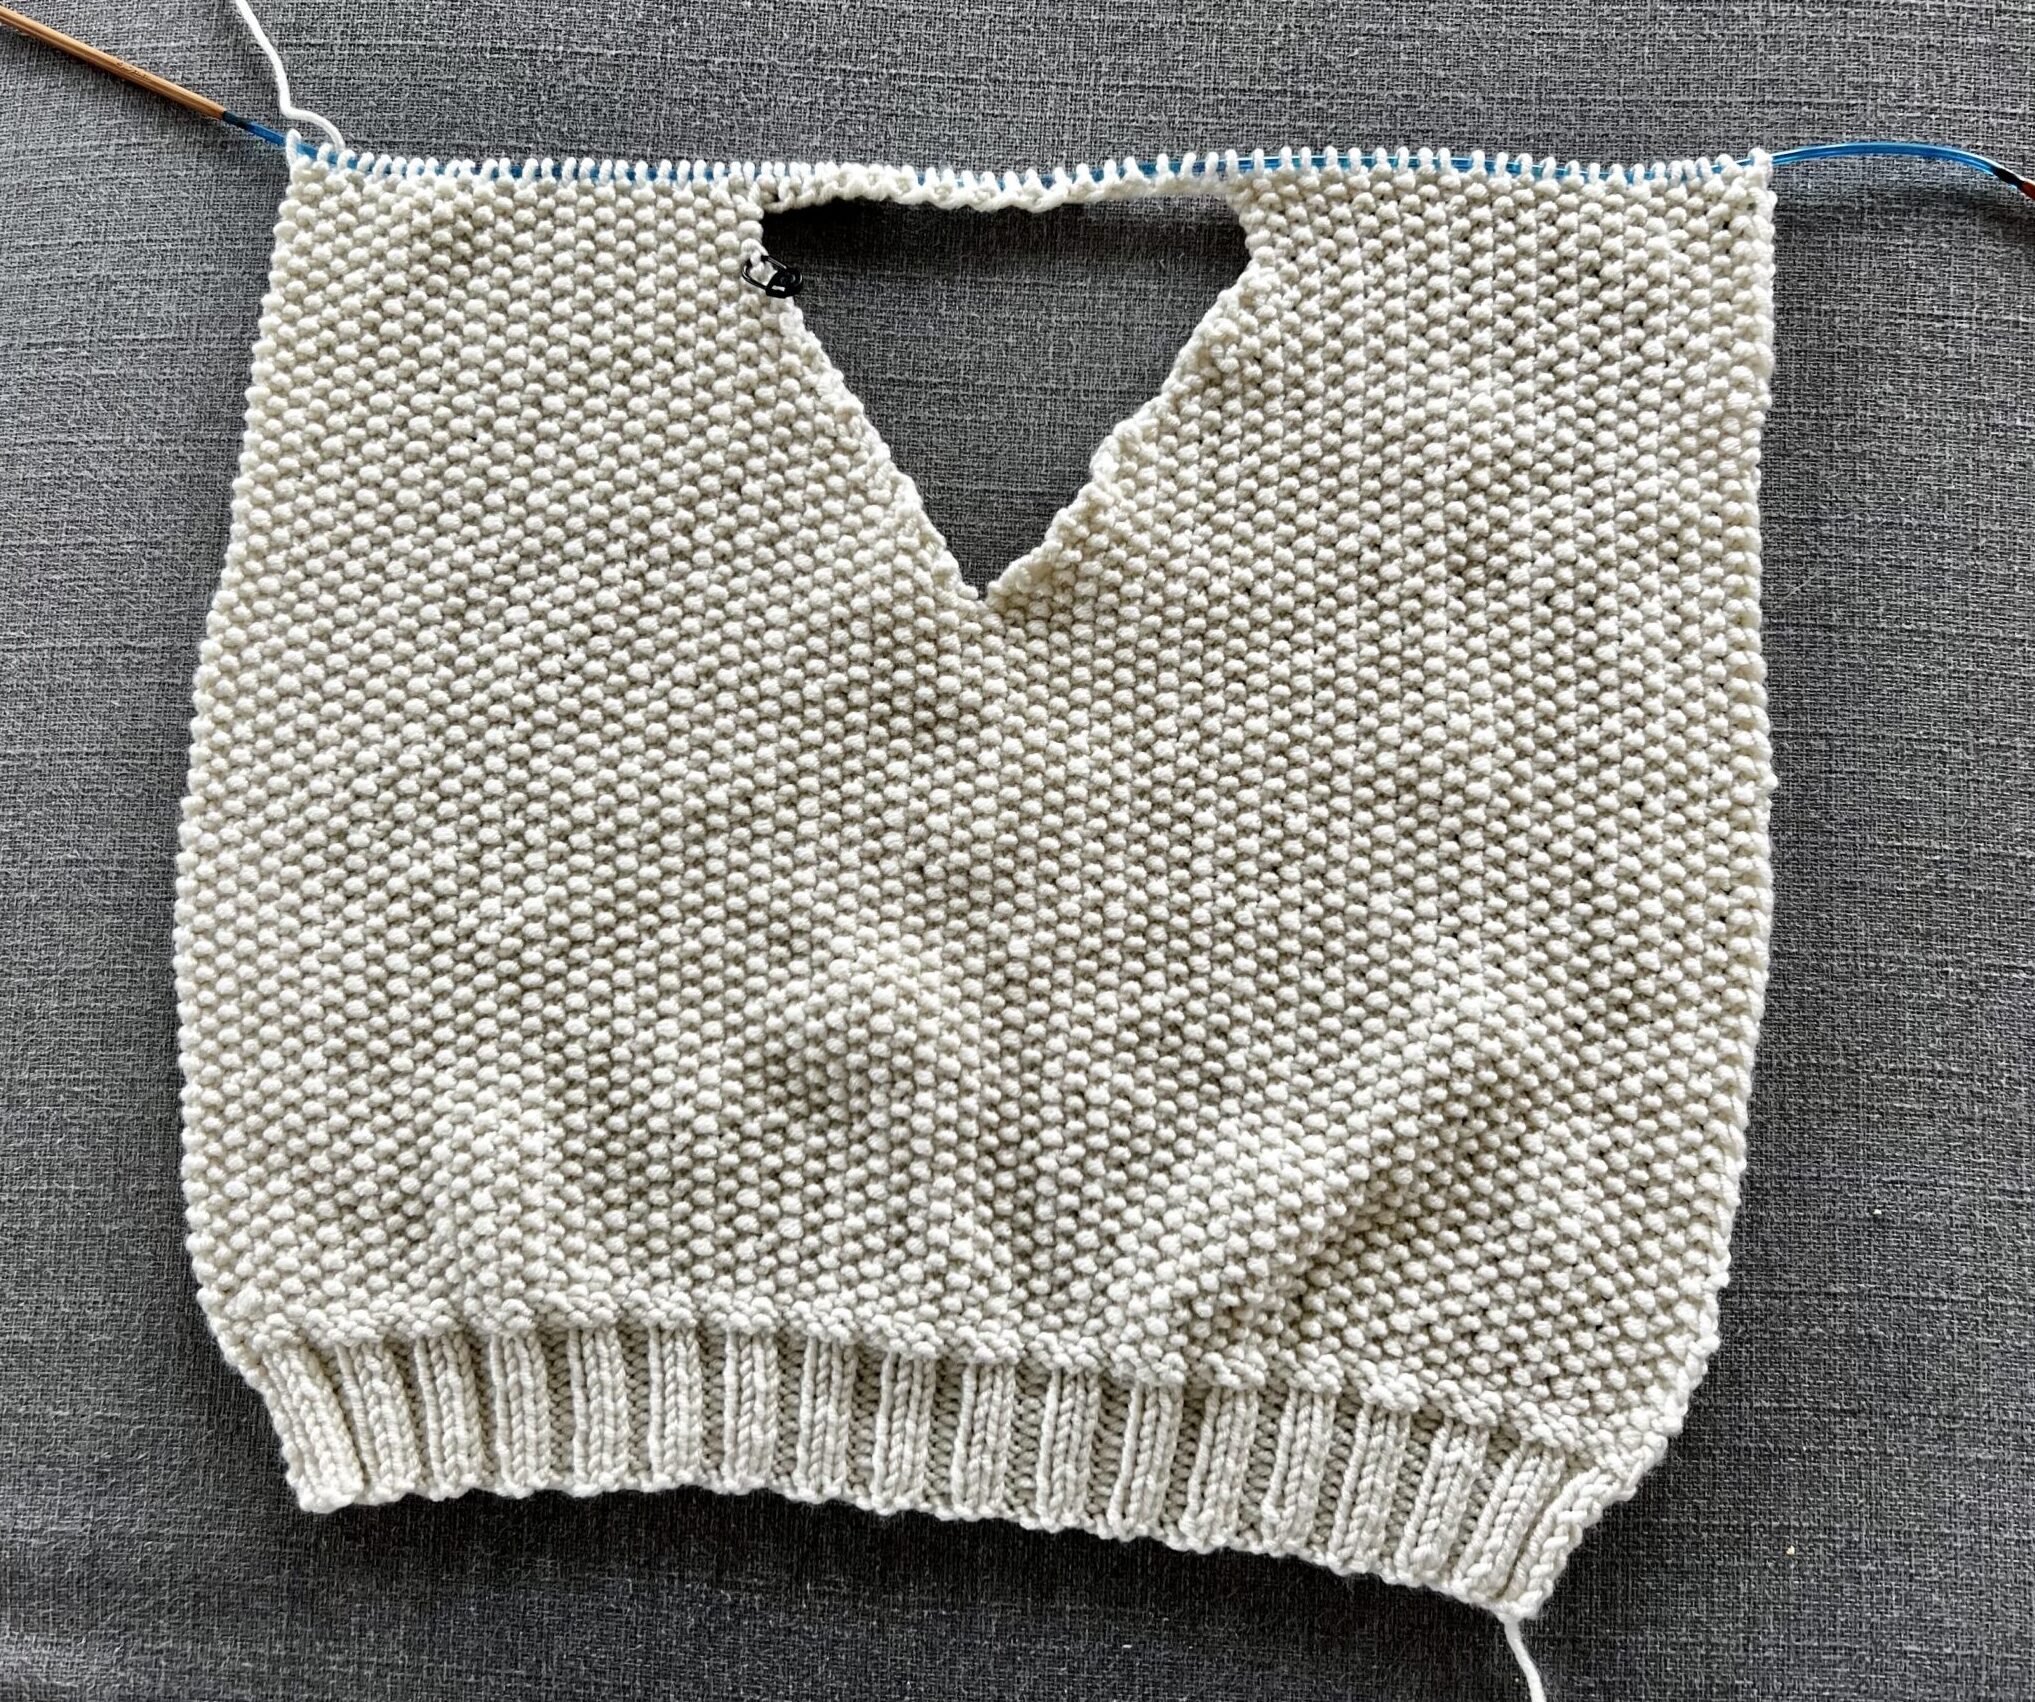
Continue working rows of seed stitch until the back panel of seed stitch is the same length as the front panel of seed stitch, ending with the right side facing you.
R22 (RS): Knit across row.
R23 (WS): Purl across row.
R24 (RS): K2, P2. (For sizes S, L, and 2XL, you will end with K2.)
R25 (WS): P2, K2. (Except sizes S, L, and 2XL; you will start with K2.)
Repeat R24&R25 until you have completed 12 rows of 2×2 ribbing. Weave in all yarn ends.

Fold in half, right sides together. Sew the sides together from the point that is 8 (8.5,9, 9.5, 10) inches or 20 (22, 23, 24, 25) cm from the top of the shoulder.

Sleeves
Working one sleeve at a time, pick up an odd number of stitches on circular knitting needles all the way around the armhole.

Work seed stitch in the round until the sleeve is approximately 15 (15.5, 16, 16.5, 17,17.5) inches or 38 (39, 41, 42, 43, 44) cm long. Do not cut yarn; continue immediately to
Cuff.
Cuff
R1: K1. (K2tog)*. *repeat around the rest of the row.
R2: K2tog. (P1, K1)*. *repeat around the rest of the row.
R3: P1, K1 (purl the purls and knit the knits to achieve 1×1 ribbing).
Repeat R3 until you have completed 12 rows of 1×1 ribbing. Weave in yarn ends.
Repeat Sleeve and Cuff instructions on the other armhole.

Collar
R1: Pick up stitches all the way around the neckline.
R2: Bind off. Weave in yarn ends.

Enjoy wearing your adorable new
Springtime Sweater!
I really like the way you explain each step and the pics are a lifesaver..Thank you…this will be for my 16 yr old granddaughter–in HOT pink!!
Yay! I’m sure your granddaughter is going to LOVE it!!
I really appreciate your easy-to-understand directions. I’ve seen similar patterns but was too intimidated to try, as they seemed really difficult and confusing. I’m a beginner knitter and, also, postmenopausal and can’t remember sh*t–har har, so your step-by-step guidance is a Godsend. Thank you so much for offering this pattern and for your great directions. I can’t wait to attempt it. 🙂
Haha! I’m so glad you enjoyed it. I’m very much a visual learner and need step-by-step guidance myself so I’m glad that it’s useful for you too! Hope it turns out great 🙂
If anyone knows how wide the finished sweater is in a size XS I’d really appreciate knowing. I might have missed that but i only saw the finished length of the S. Thanks 🙂